Showing posts with label Sweets. Show all posts
Blueberry Coffee Cake
Posted by
TheChocolateCookie
at
4:01 PM
Hello again foodies! I am so excited about this post, for many reasons, but mainly because it is SO delicious! A few days ago I was inspired and on a mission to make blueberry cupcakes, like....really BLUE blueberry cupcakes and frosting. So I set out to Winn Dixie to pick up blueberries and some buttermilk, only to return home and find out that the two pints of berries I purchased (at a hefty price, I might add) were greenish white inside! Being from Maine, where blueberries are the state 'fruit', I had never seen a blueberry that was white inside, and not gushing purple goo. At first I was quite irritated at the fact that they were white and kind of sour but, feeling rude, I did not want to return them either.
Last night I found a blueberry coffee cake recipe and decided it would still be a tasty way to use up most of the berries, and gave it a try. I combined it with a family coffee cake recipe and it was a success. Now, they say you learn something new everyday, what did I learn? I learned last night, that these ugly white-fleshed berries, magically turn blue and ooze purple once cooked!! It just has to be magic, I'm not kidding, I pulled one berry out of the baked cake and squashed it in a paper towel. Purple berry guts everywhere, no white or green remnants in sight! The moral of the story today is: "Don't doubt the 'blue' in the blueberry. It will make its appearance!" While the berries are still a bit more sour than regular wild blueberries, the sugar-crumb filling in this recipe balances it very nicely. So whether for breakfast, dessert, or a snack; enjoy!
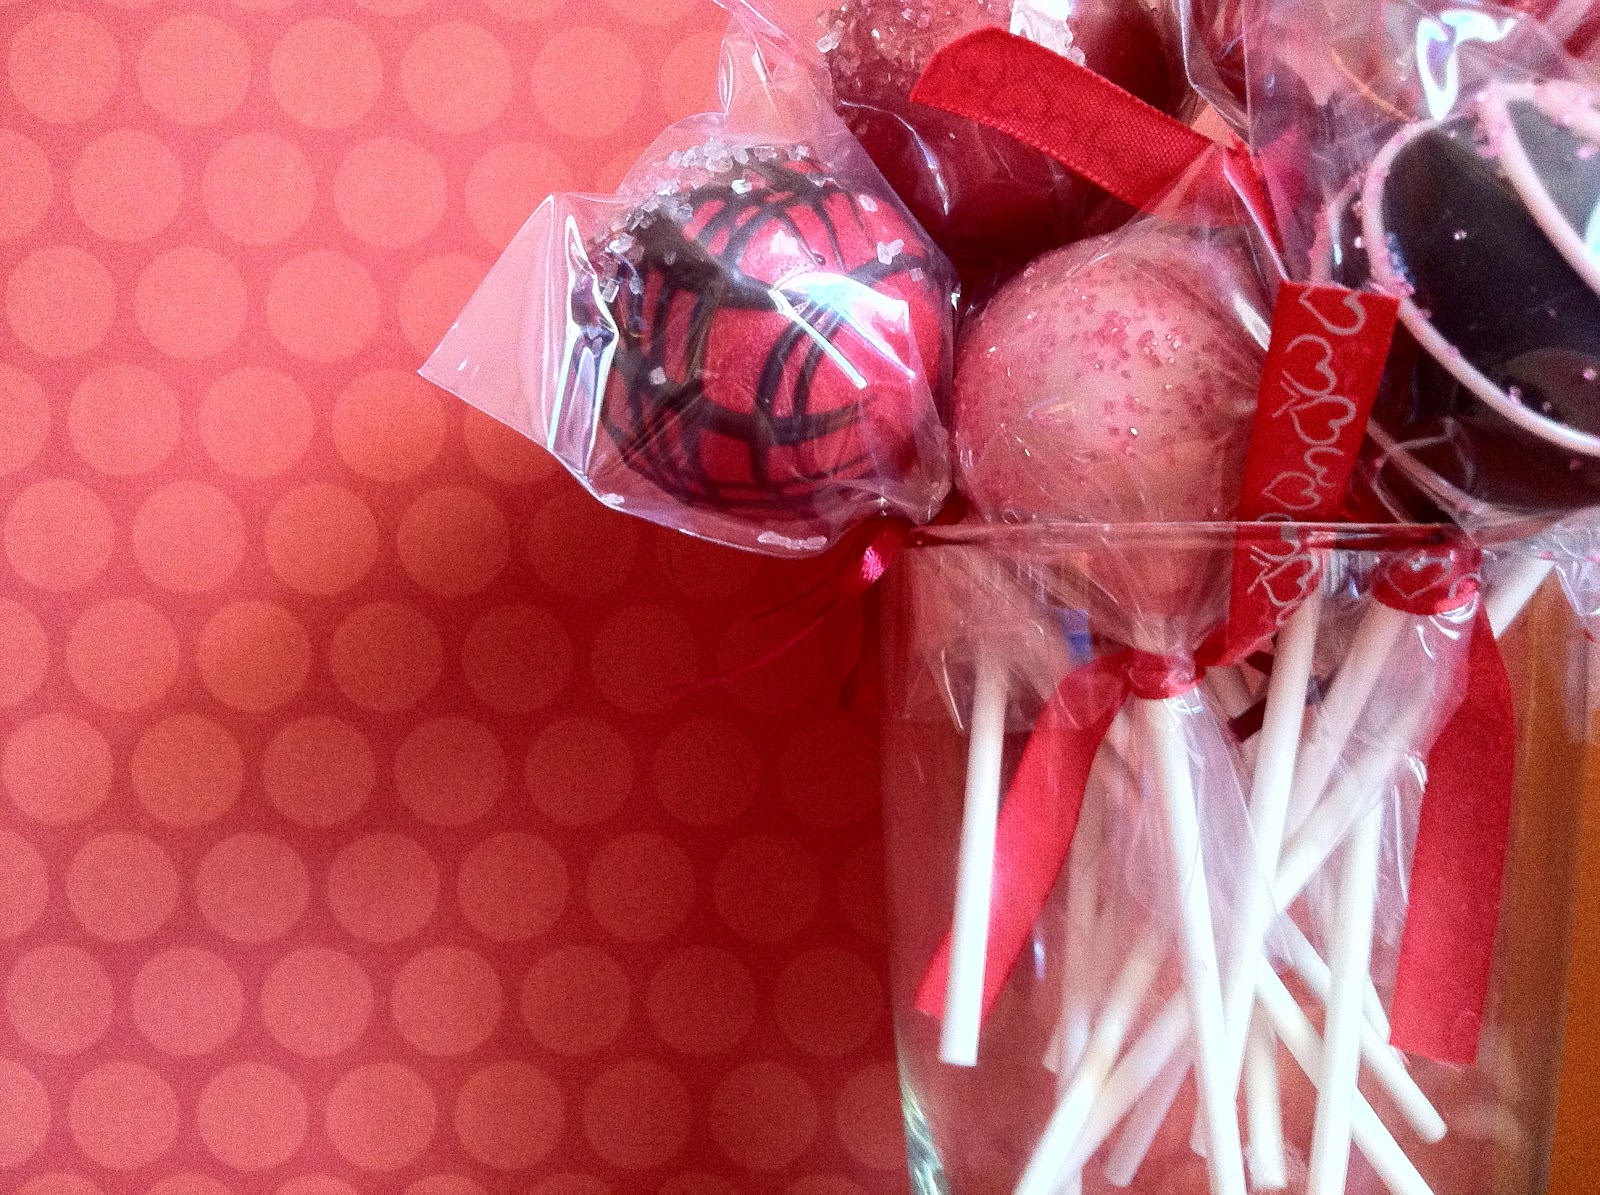
Valentine's Cake Pops!
Posted by
TheChocolateCookie
at
12:55 AM
Yay, Asa finally posts more cake pops (and more to come)! For valentine's, I got some requests for cake pops, which I was planning on doing already. One of my friends wanted to learn more on how to make them, and the whole situation turned into a cake pop making party. Hors d'oeuvres, mimosas and all! Between the 5 of us at this brunch...we must have made more than 80 or 90 cake pops! It was a lot of fun, creation, and food! Here are the end results, just in time for valentine's day!
LOTS of photos!
Photos by The Chocolate Cookie
12 Treats of Christmas: Sugar Cookies
Posted by
TheChocolateCookie
at
12:55 PM
This Christmas I sent little "care packages" to my family and Jon's parents. In addition to the fudge and cake balls, I made some quick wintery sugar cookies too! I didn't have a lot of time to take photos so this is about all I've got for you :-). I am also currently looking for my lost recipe :( so I will have to post it later.
12 Treats of Christmas: Santa Hat Cake Pops!
Posted by
TheChocolateCookie
at
1:46 AM
Hello, sweets-eaters! So, the last few months I have been dabbling in something new, something amazing! Cake pops! I made some cute Halloween ones and some pink ones which I may still post later, but today I bring you cake pops full of Christmas spirit: Santa and elf hat pops! Some of you know of what I speak; others of you are probably asking what a cake pop is. A cake pop (originally invented by the one and only, Bakerella.) is basically delicious cake, molded into a "cake ball" and gloriously made into a' pop' by dipping it in candy coating or melted chocolate. If you are a chocoholic like me, or simply a sweet-o-holic, you cannot tread this earth without trying one....or 20!
12 Treats of Christmas: Chocolate-Walnut Fudge
Posted by
TheChocolateCookie
at
9:44 PM
What would this Christmas be without a "little" chocolate!?! I was craving fudge pretty bad so I decided to whip some up for the 12 Treats. This recipe turned out really well, but also really sweet (fine by me). Cut it into smaller pieces if you don't want to overdose... Or cut them large...either way! :-)
12 Treats of Christmas: Mini Whoopie Pies - Red Velvet
Posted by
TheChocolateCookie
at
12:38 AM
Hey all! Time for some more sweets! These cute little cakes are less of a traditional Christmas dessert but are becoming sort of a tradition for me as I've made them the last 3 or 4 Christmases. Being from Maine, I pretty much grew up knowing what a Whoopie Pie is, but if you're going, "A whoopie what??" I'll explain. A whoopie pie is basically two flat cakes, or cookies, as some refer to them, joined together with a sweet marshmallow-ey cream. While these palm or burger-sized treats can be found in gas stations and Ma & Pa restaurants all over New England, they were originally invented with the Amish.
12 Treats of Christmas: Peppermint Cupcakes
Posted by
TheChocolateCookie
at
1:53 PM
Christmas time is HERE!! Everything about this time of year makes me happy and puts me in the Christmas spirit: the smell of pine trees, the colors of red and green everywhere you look, and Christmas lights blanketing every street, house and tree! But probably most of all, it's the sweet taste and smell of all the warm holiday treats that materialize out of every kitchen, including mine. I started this blog in January of last year and so we have not yet had a taste of the holidays here at the Chocolate Cookie. (I've also been slacking a lot the last few months on posting recipes.) So it's time to seriously bring on the sweets, and finish out the year with 12 Treats of Christmas!
With everyone warming people up with their peppermint coffees and other peppermint goodies this time of year, I figured this would be a good time to do some more cupcakes. So I made a chocolate cupcake, with chocolate peppermint ganache and peppermint swirl buttercream.
The Cupcake Book: Creme de Menthe
Posted by
TheChocolateCookie
at
11:04 PM
The Cupcake Book: The Mocha Latte
Posted by
TheChocolateCookie
at
11:15 PM
I must start by saying that this cupcake was DEVINE!!! By far the best cupcake, AND frosting, I have made yet. This weekend I was inspired by nothing in particular (except maybe the craving for a Starbucks Mocha) to make a "Cafe Cupcake" series of cupcakes. And while it only took me a few days to sit down and blog about it, well.....they're all gone as of tonight!
The Cupcake Book: Red White and Blue!
Posted by
TheChocolateCookie
at
12:58 AM
Happy Independence Day!!!
Today, in Honor of our wonderful country, those who fight for us, and the celebration that is the 4th of July, I made a Patriotic "Lemonade" Red White and Blue cupcake! This morning I got up and made some fresh squeezed lemonade and infused these cupcakes with a little of it. These babies looked SPECTACULAR, but the 'lemonade' flavor didn't quite come through in the cake, the frosting however was very delicious and lemonade-esque. Though they rose just fine, they do need some work because they were a little tough; I think it was from over-stirring when I dyed the red and blue portions of batter. Oh well, they still represented today's festivities marvelously!
The Cupcake Book: Red Velvet "Big Top" Cupcake
Posted by
TheChocolateCookie
at
12:24 AM
This is the start to a huge project of mine. It's simple really, I have been periodically penciling ideas and drawings for cupcakes in a notebook and now I am going to begin creating them all; one amazing cupcake at a time. But lets start where the motive really lies... I grew up in a house where a woman sure could cook/bake...that'd be my mom! My mom used to decorate cakes and wedding cakes, she taught me how to bake, and though that part of me has stayed dormant inside for quite a few years, in the last 2-3 years it has come back with momentum! To the point where I dream of either having my own little bakery/cafe or being a chef. Or simply going on Hell's Kitchen someday and being screamed at by one of the greatest, if not THE greatest and most intimidating chef in the world, Chef Ramsay. I love cooking and baking alike, but something about pulling an amazing pastry or piece of cake out of the oven is just so rewarding. I think its the nerdy science/chemistry part of me that just loves seeing some nasty-on-their-own-tasting ingredients put together and come out as heavenly, addictive, sinful treats!
New T.H.E.B.O.M.B. Brownies!!
Posted by
TheChocolateCookie
at
10:01 PM
The secret is out!!!...(and I'm back to blogging).... I've finally constructed the perfect brownie! In my earlier post: Totally Heavenly Edible Big Outstanding Mocha Brownies (T.H.E.B.O.M.B.) I had begun a quest of sorts to create the perfect, heavenly, gooey, chocolatey, moist, dark brownie, and here it is! Though these are minus the 'mocha' part, I think you'll still love them. Brownies aren't that difficult to make but to conjure up the perfect textured brownie to your personal liking can take quite a bit of chemistry; and that is what I have been working on. More eggs yeilds a "cakier" brownie, less, a "fudgier" brownie. Then theres the decision of whether to melt the butter or cream the butter with the sugar; melt the chocolate or use cocoa, and which type of chocolate to use, as different chocolates have different cocoa butter proportions. A lot of these conundrums depend, in fact, on what type of chocolate you use. So, I am still in the process of making the perfect brownie recipe with 'regular' cocoa, as the hubby is not a huge fan of overly chocolate confections. (pffshhh! an outrage!)
A little research on the becoming of The Brownie will show many tall tales going a little something like "so-and-so forgot to add flour to their cake" or "so-and-so melted the butter in their cake by accident" but no one knows exactly how it came about, except that it was not to long ago, in the late 19th to early 20th century. I came across an interesting tidbit that a lot of you Mainers will probably like too. Apparently, legend has it that the most likely story is that the brownie was created in Bangor Maine when a woman forgot to add baking powder to her cake. Now destroyed, she didnt throw it away but instead cut it into flat bars of "cake," served it and that recipe is published in a 1912 cookbook. (I got excited!) Unfortunately the first brownie recipe published was in 1906 by the famous, Fannie Merritt Farmer....and the Bangor recipe was almost identical. Still cool though!
So here are my brownies, the butter is melted and then heated with the sugar. This heating process is what gives the brownies their light flakey meringue-like tops. The most sinful detail of these brownies is the dutch cocoa (read more about dutch cocoa and chocolate types in my Triple Chocolate Mousse Cake recipe.) As I said, I am still working on the perfect simple chocolate brownie recipe, so stay tuned....I'll find it someday :)
Deep Down Dark Chocolate Brownies
- 1/2 cup butter
- 1 cup sugar
- 2 large eggs
- 3/4 cup dutch process cocoa
- 1/4 tsp salt
- 1/2 tsp baking powder
- 1/2 tbsp vanilla
- 3/4 cup flour
- 1/4 to 1/3 cup semi-sweet chocolate chips or chopped dark chocolate
1. Preheat the oven to 350 degrees and very lightly grease an 8x8 or 9x9 pan.
2. Melt the butter over low heat, once melted, stir in the sugar and cook until hot but do not boil! Mixture should become shiny and "glossy." Cool a little
3. Meanwhile, beat together the eggs, cocoa, salt, B.P., and vanilla. Mixture will be sort of dry.
4. Stir in the butter/sugar misture and mix until smooth. Add the flour and chips last, when youre ready to throw them in the oven. Stir in until JUST combined. (Its okay if the chips melt a bit, they will be heavenly in the end.)
5. Pour into prepared pan and bake for about 20 minutes. Maybe 21 :)6. Remove and let cool. (Remove yourself from the room for about 15 minuts, I have to so that I dont eat them and burn my face off haha)
Enjoy!
Photos by the Chocolate Cookie
Penguin Cupcakes!!
Posted by
TheChocolateCookie
at
11:54 PM
First of all, Happy WAYYY Belated Birthday to my hubby Jon! I made these penguin cupcakes as a cupcake cake (CCC) for Jon's birthday last month because he loves penguins! And I guess also because I figured it would be super fun and give me some more practice on my cake decorating/fondant skills. (I will be posting a special fondant/cake section in the near future with more cake fun and a fondant recipe/tutorial!) The only thing that didn't turn out so great with these, was the cake part. It was okay, and edible, but they were pretty dry and too thick, just not the right texture. So for now, use your favorite cupcake recipe. Oh, and I swear the black stuff was not intended as penguin poop, as Jon joked, but instead it is supposed to look like ocean rocks.
These penguins may look cute and chilly but don't worry, I gave them candles later ;) Here are 5 of the 7 little guys I created:
The Penguins:
For the penguins I made fondant and dyed about a third of it black with Wilton concentrated food-dye; this process takes quite a while! The darker the color, the harder it is to make it come out an even, smooth color. To dye fondant, use a toothpick to insert the amount of dye desired into the ball of fondant. For black, go to town with the dye because you will need it. Then you will basically knead the ball until the color spreads, folding and kneading over and over. This takes a LOT of time and patience, but on the bright side, you get a nice hand workout. I dyed a much smaller portion yellow, which didn't require as much dye, and of course the white, is just plain fondant. For the scarves and hats, I simply used a tube of royal blue icing which hid the space between the wings, head and "neck." This, I also used to "glue" on the heads, wings and other body parts.
As I mentioned above, the cake part did not turn out great, and at this time of writing, my "Chilly Blue" buttercream frosting recipe has gone missing. When and if I find it, I will be sure to update, because the frosting was definitely DELICIOUS! All I can tell you is it involved confectioner's sugar, whipping cream and sky blue dye. Haha...Sorry folks!
Photos by The Chocolate Cookie
Triple Chocolate Mousse Cake
Posted by
TheChocolateCookie
at
1:40 AM
Onto the sinful eats! This cake recipe is courtesy of Marta Stewart, though next time I might use a tad more oil, and/or bake a shorter amount of time as it was slightly dry (using the dutched cocoa, we need to account for the lack fat after the removal of cocoa butter, of course. I don't think Martha knew that ;) Alton Brown would :-)). I did alter the ratio of milk/water, using more milk than water. The mousse recipes are renditions of my french silk pie filling. Noms! But seriously, these are amazing, and take a bit of time to make, but they are great for a make-ahead dessert, and can be frozen! (Tip: For dieters or not-so-Asa-like-sweet-toothed folks, you may want to share one cake with a friend)
Triple Chocolate Mousse Cake
Layer #1:
- 6-8 ceramic ramekins
- cooking spray
- 1/3 cup dutch processed cocoa
- 2/3 cup sugar
- 2/3 cup flour
- 1/2 tsp baking soda
- 3/4 tsp baking powder
- 1/4 tsp salt
- 1 lg egg
- 1/3 cup milk +enough water to make 1/2 cup
- 3 tbsp vegetable or canola oil
- 1/2 tsp vanilla extract
- wax paper and tape
2. Pour batter, dividing evenly, among ramekins. (Mine filled 6, but I made slightly larger cakes, so I could eat the extras :)) Bake in oven on cookie sheet for about 20 minutes, or until a toothpick comes out with a little crumb on it, not completely clean as they will continue to cook. Remove from ramekins as soon as you can without burning yourself by running the back of a knife around the edges. Cool on wire rack. (It is okay to let them cool completely in ramekins before unmolding, in fact they weren't too much drier, and it made them come out easier, and in one piece.)
3. Level the cakes by using a knife to cut the tops off. Using the wax paper, cut a strip long enough to go around the cake, and about 4-5 inches high. Wrap it around the cake to make a cylinder and tape to secure. This will make our mousse molds!
Layer # 2:
- 1.5 sticks of butter (12 oz), softened
- 1 cup sugar
- 3 oz. unsweetened baking chocolate, melted and cooled
- 1.5 tsp vanilla
- 3 lg eggs
2. Using a piping bag or spoon, pipe a 1-inch layer on top of each cake, flattening the top of the mousse a bit. Place cakes in refrigerator while preparing layer 3, at least 20 minutes, to allow mousse to set up.
Layer # 3:
- 4 oz. semi-sweet baking chocolate
- 1 tbsp or so butter
- 2 egg yolks
- 1 tbsp sugar
- 1 1/4 cup whipping cream
2. In another small saucepan, whisk together the egg, sugar, and remaining water (2 tbsp). Cook over low heat until mixture bubbles slightly but DON'T allow the egg to cook. Stir in the chocolate mixture until smooth. Allow to cool, preferably in an ice water bath to avoid the whipped cream from melting in the next step.
3. Whip the cream on high speed until stiff peaks form and you have a nice stiff whipped cream. Fold into the cooled chocolate mixture until blended. Pipe or spoon a 1-inch later on each cake as before. Refrigerate for 4 hours or overnight. Top with chocolate garnish curls for added eye-candy, remove wax paper and enjoy!
Photos by The Chocolate Cookie!
Fresh Blueberry Muffins
Posted by
TheChocolateCookie
at
10:15 PM
So this week I made a dessert that brought me back home to Maine: blueberry muffins! I bought a pint of blueberries for my panna cotta topping earlier this week and, "Oh no! What do I do with the rest?" Well, we've been too busy in the mornings to make pancakes lately, so what better than to make some muffins to take on-the-go! Though these were pretty delicious and exploded with yummy blueberry heaven, I might bake them just a tad longer next time. Tip: When adding fresh fruits or fillings to muffins, cake or cupcakes, you want to cook them just a little longer and sometimes even add a little bit more leavening (i.e. baking powder/soda) because the fruit pieces tend to work against even heat distribution inside the batter, and cause them to take longer to rise properly. You could probably throw in fresh raspberries, blackberries, or strawberries instead if you want. Just remember that you will have to play around with baking times for each. Also, these muffins are "low in sugar." Most blueberry muffin recipes tend to use about 1-1.5 cups of sugar, I only use about 3/4 cup. While its by no means 'diet' its still less and allows the blueberries to provide most of the sweetness. :)
- 1/2 cup butter, softened
- 3/4 cup sugar
- 2 eggs, beaten
- 1/2 cup milk
- 2 cups flour
- 2 1/2 tsp baking powder
- 1/2 tsp cinnamon
- 1/4 teaspoon nutmeg
- a dash of ground cloves
- 2 cups fresh blueberries (mine were rather large mmm)
- a couple tbsp sugar for topping
1. Preheat oven to 375 degrees. Grease the cups of a muffin pan with shortening, or line with muffin cups.
2.In a medium bowl or mixer, cream together the butter and sugar. Add eggs one at a time, mixing thoroughly after each egg.
3. Combine the dry ingredients and add to mixture portions at a time, alternating with milk.
4. Fold in the blueberries, careful not to mash them.
5. Fill the muffing cups 2/3 full (I didn't use paper cups, so I just like to fill them to the top). Sprinkle tops with a bit of sugar to crust. Bake about 20-25 minutes, or until light golden brown and a toothpick inserted into the center comes out mostly clean with a few stray crumbs. If you did not use muffin cups, let cool in pan for 5 minutes before removing to rack, if you used cups, remove immediately and cool on rack.
Photos by The Chocolate Cookie.
This week I bought some strawberries that I was intending to eat as a health sweet snack to keep me away from candy and such. I cut them into large chunks and after a couple days I realized...I was not snacking on them. So I decided to remedy the situation by turning it into dessert! I whipped out my rolling pin and got right on making some homemade shortcake. The key to a soft, light shortcake, as with most breads or baked goods, is to minimize the time mixing, handling and touching the dough once your wets and drys are introduced to one another. Once that flour is added, you'd better have a plan. You'll notice a lot of pastry/ baked good recipes state at some point "until JUST blended" or " just combined," don't ignore this direction, at this point, the more you mix and stir the tougher and drier your bread or cake will be. Cut these babies open and fill them with fresh strawberries, a drizzle of strawberry juice and some sweetened whipped cream!
Homemade Shortcake with Strawberries
- 2 cups flour
- 2-3 tbsp sugar
- 1 tbsp baking powder
- 1 tsp salt
- 6 tbsp shortening
- 3/4 cup milk
- 1 container fresh strawberries, cut up
- whipped cream (a couple scoops per serving)
2. Add the shortening, cutting it in using a pastry blender or a butter knife and fork. Cut in until the mixture forms crumbs. (This step can seem frustrating because the crumbs arent very obvious, just keep cutting in until the shortening is no longer in large peices.)
3. Add milk all at once and blend together until JUST combined. Use the ball of dough to pick up any dry peices at the bottom of the bowl if needed, do not keep stirring.
4. Transfer your dough to a lightly floured peice of wax paper. Fold and knead the dough in a down-and-forward motion about 20 times. Dough should begin to appear smoother and well blended.
5. Roll your dough out to about 3/4 of an inch and cut with a round cutter (I use the open edge of a large measuring "cup.") Keep reforming the dough and rolling or patting it out until almost gone. (Makes about 6 shortcakes) You can also skip rolling the dough and drop in small chunks instead.
Photos by The Chocolate Cookie
French Silk Pie
Posted by
TheChocolateCookie
at
1:09 AM
Today's delectable concoction of amazingness?: French Silk Pie. That's right, it was National Pie Day (no joke) so I made you all a pie! Chocolate silk, French silk, French chocolate silk, silky chocolaty yum yums...call it whatever you want, but it really is a piece of heaven! This pie is so creamy and smooth, so sweet and soft, you will have to force yourself not to have a second piece, (I tried to force myself, but myself won tonight and had another piece, darn self!) I first made this pie at Christmas this year and it was amazing. It can be made with either a graham cracker crust or a regular pastry crust; but I really can't decide which tastes better.
The trick with French silk pie is in adding the eggs. When you add the eggs this must be done on a pretty high speed or you are going to be twiddling your thumbs for a long, long time. Sufficed to say, you may not want to do this recipe by hand. Beating the eggs in on high incorporates the air that you need into the mix that you need to form fluffy stiff peaks, just like when you make homemade whipped cream (below). Another tip, for a thicker pie, you can substitute an additional ounce of baking chocolate for 2 tbsp of the butter (6 tbsp instead of a whole stick), this was how I made it the first time and if you're in the mood for something with a bit more body, go with the thicker version. Enjoy and have a Happy National Pie Day!
French Silk Pie
- 1/2 cup butter, softened
- 3/4 cup sugar
- 2 0z. unsweetened baking chocolate, melted and mostly cooled
- 2 tsp vanilla extract
- 2 large eggs
1. Cream together the butter and sugar until smooth. Mix in the chocolate and vanilla until well incorporated.
2. Next add the eggs, one at a time, beating on medium-high speed for about 5 minutes after each egg. Batter should form smooth, stiff peaks.
3. Pour into a prepared graham cracker or pastry pie crust and refrigerate for at least 2-3 hours, or until hard-set (pie should be fairly firm on top). Top with whipped cream and chocolate shavings if desired.
Whipped Cream Topping
- 1 cup heavy whipping cream
- 2-3 tbsp powdered sugar
1. In a well-chilled mixing bowl, beat cream and powdered sugar together on medium-high speed until stiff peaks form, scraping bowl as needed. Do not over beat.
Note: this pie filling is gluten free, based on the type of baking chocolate used. Try it with a gluten free pie crust!
Photos by The Chocolate Cookie
Cream Puffs (Profiteroles)
Posted by
TheChocolateCookie
at
2:59 PM
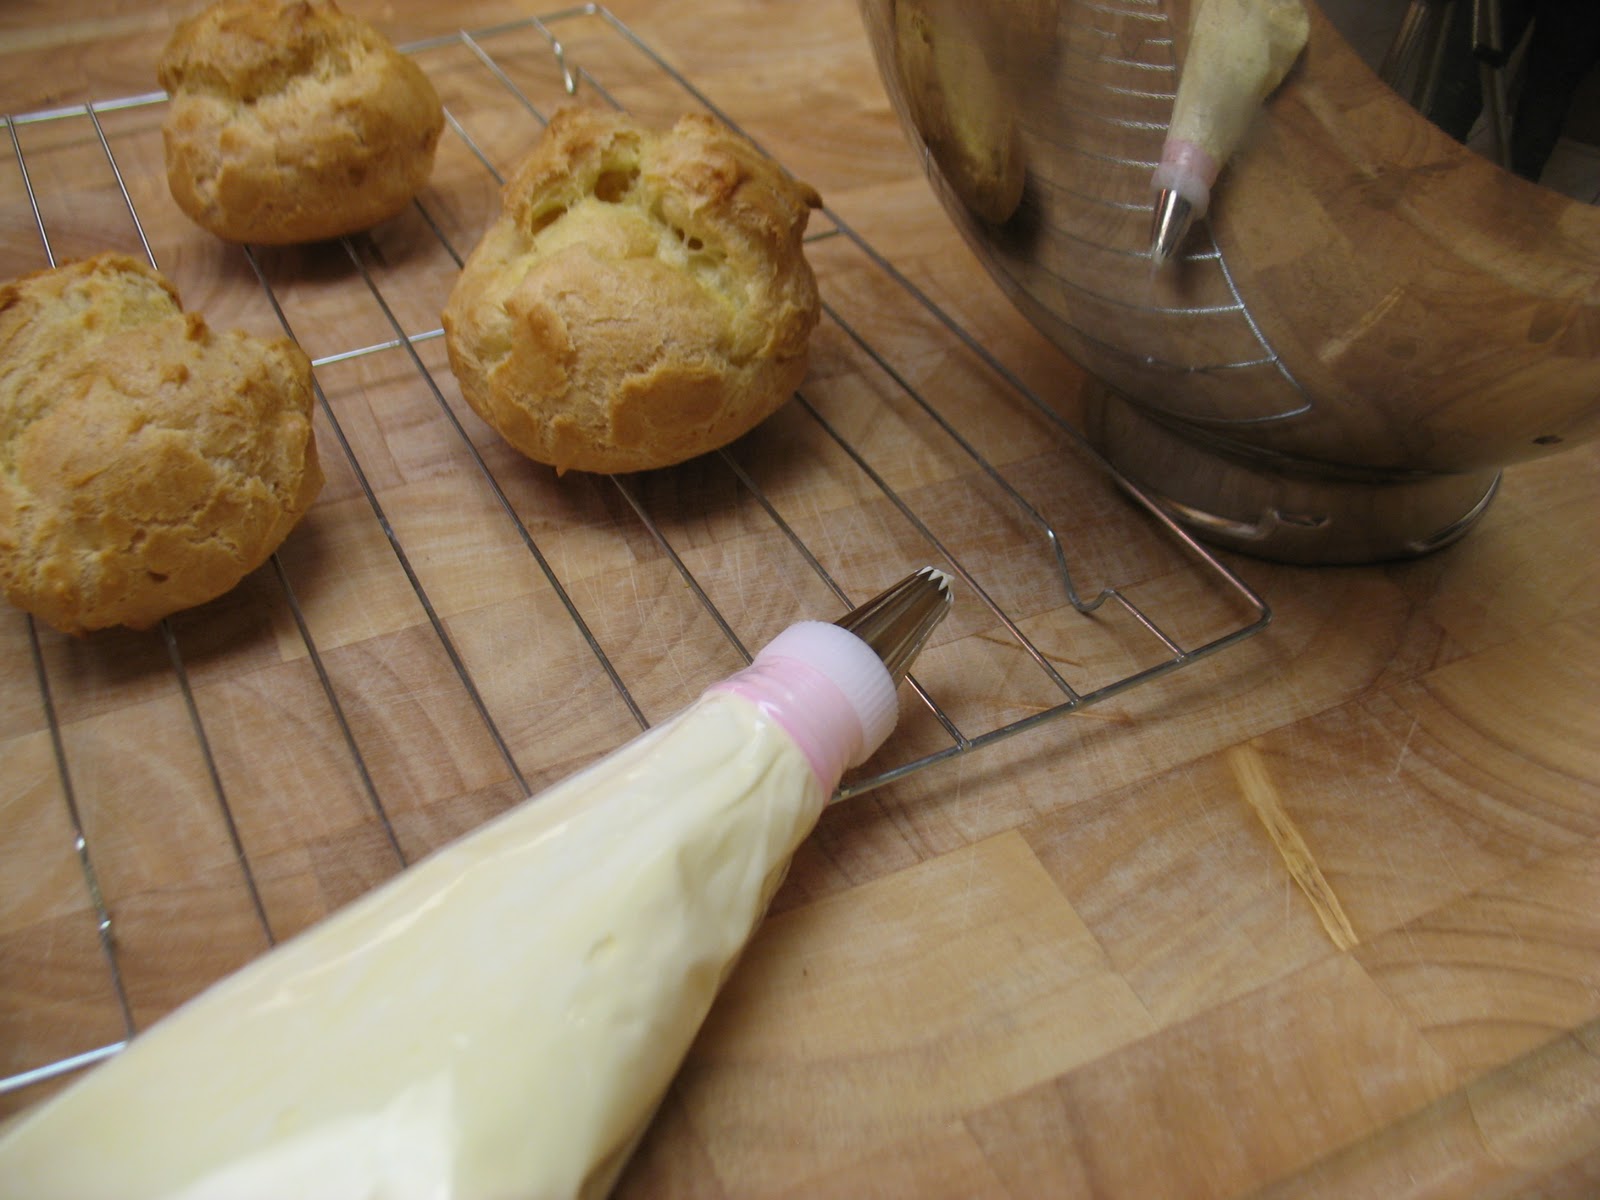
I had asked my hubby a while ago, "What should I try? What do you want to eat" and he said, "How about a cream puff?" This recipe is so amazingly simple and yummy! I'm so happy that I tried it, you really don't need anything special to make them, unless you want to get fancy, and they're easy! I made the basic choux puff, and then for the filling I sort of mixed both types and went the really easy route, I made a vanilla pudding and folded in my homemade whipped cream. It made for a lighter, creamy filling.
When my husband and I tried them, I was slightly wary about them, but they were delicious. In fact, they got a rating of 10 on the Hub-O-Meter, and a 10 is very rare! It's not that my food is never delicious, it's that he doesn't just give out 10's. In case you're wondering about the Hub-O-Meter, my husband Jon and I have a rating system when I try new things. A '4' or '5' is "Alright", '6' or '7' is "That's pretty good, I'd eat that again" and '8' and above is "KILLER". So, that gives you an idea what an H.O.M. '10' represents. I will probably be using the H.O.M scale in future blogs, so keep an eye out for that, now you know what it is.
So onto the recipe. I did a half batch (about 8 large profiteroles), figuring that the holidays did enough damage to our tummies and thighs, but here is double that, which would probably make about 16 large, or 24 smaller cream puffs. The larger the cream puffs get, the harder it is to get the middle completely dry/cooked through, but this is still okay; just take out all the moist egg-like dough and it makes for more filling room, which you want. ;)
Cream Puffs (Profiteroles)
Makes about 16 large Puffs
- 1 cup water
- 1/2 cup butter
- 1 tsp salt
- 1 tsp sugar
- 1 cup all purpose or pastry flour
- 4 large eggs
1. Preheat the oven to 400 and lightly grease a baking sheet.
2. In a medium saucepan, bring the water, butter, salt and sugar to a boil, stirring until the butter is melted and blended throughout.
3. Add the flour all at once, remove from heat and stir constantly and vigorously until the mixture forms a ball of dough that sticks to the side of the pan and does not separate.
4. Transfer to an electric mixer fixed with the paddle attachment (you can do this step by hand as well). Beat on low for a minute to release some heat from the dough. Add the eggs one at a time and beat until well blended and smooth.
5. Drop dough onto baking sheet in large spoonfuls and bake for about 35 minutes, until nicely golden brown. Remove from oven and transfer to a wire rack to cool. Gently cut a small slit in each puff. (This allows steam to release and keep them from collapsing at all.)
6. Cool about 20-30 minutes before filling. Cut the top 1/3 to 1/2 of each pastry off and remove any moist dough. Fill with filling (using a spoon or piping bag) and replace each top.
Drizzle with chocolate sauce (optional).
Filling
- 1 box instant vanilla pudding
- 2 cups of milk (or as directed on package)
- 2 cups heavy whipping cream
- 4-5 tbsp confectioners sugar
- 1 tsp vanilla
1. Chill mixer bowl and whisk attachment for about 20-30 minutes.
2. Prepare vanilla pudding as directed on packaging
3. Place whipping cream in bowl, add powdered sugar and beat on HIGH for 5-10 minutes, or until it becomes very fluffy and forms stiff peaks. Scrape bowl as needed. Add vanilla and beat another minute or so, keeping the stiff, fluffy texture, but making sure not to over beat.4. Gently, without stirring, fold whipped cream and pudding together, until it becomes a light yellow color and creamy texture.
Enjoy!
Photos by The Chocolate Cookie
Subscribe to:
Posts (Atom)